
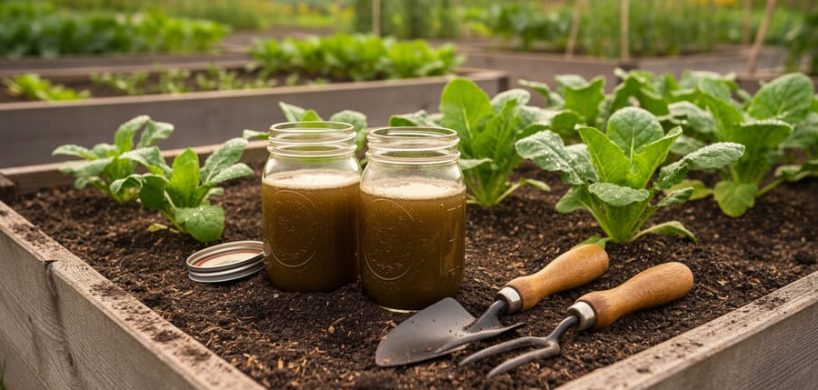
Jadam organic farming is a soil-focused, ultra-low-cost method that uses locally sourced materials to create microbial preparations, fertilizers, and pest controls for growing food without synthetic inputs. At its core, this approach centers on three interconnected techniques: cultivating beneficial microorganisms from your own soil, fermenting plant matter into liquid nutrients, and creating natural pesticides from simple ingredients like sea salt and cooking oil. Unlike many non-GMO farming systems that rely on purchased organic amendments, Jadam encourages growers to source nearly everything on their property or within their community, making it accessible to small-scale farmers and home gardeners working with minimal budgets.
The system emphasizes observation and adaptation rather than rigid formulas. You learn to read your soil, identify which local plants are nitrogen-rich or pest-repellent, and adjust preparation ratios based on what your crops show you. Because every microorganism culture is drawn from your own environment and every fermented input is shaped by your climate, results vary between regions and seasons. That’s not a limitation but the method’s strength: it trains you to become responsive to your land’s specific conditions rather than following standardized protocols designed for different soils and climates. The learning curve involves experimentation, record-keeping, and patience as beneficial microbes colonize your soil over multiple growing cycles.
Understanding the Jadam Method: Core Principles and Philosophy
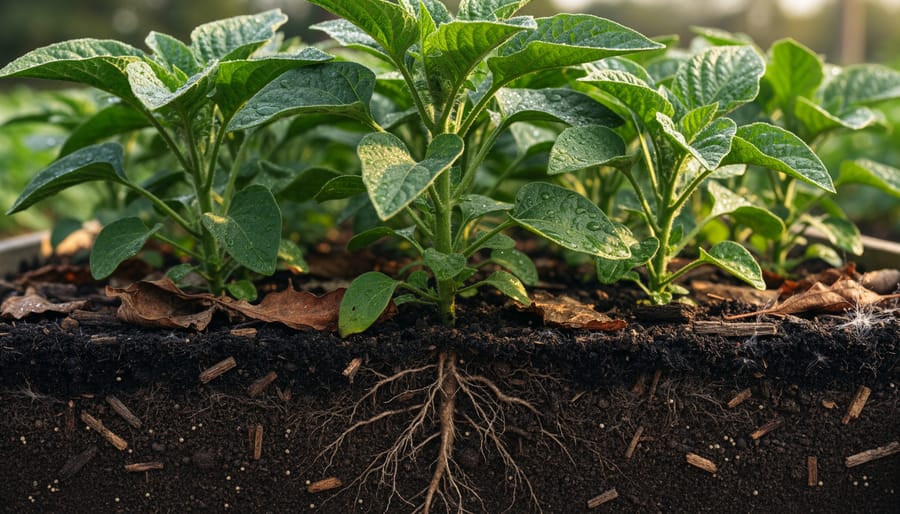
Jadam farming represents a fundamental shift in how we approach organic agriculture, built around the idea that effective farming shouldn’t require expensive inputs or complicated technology. At its heart, the method relies on cultivating and applying indigenous microorganisms, the beneficial bacteria and fungi already present in your local environment, to enhance soil health and plant growth. Rather than purchasing commercial amendments, you create water-based microbial solutions and liquid fertilizers from materials you can find around you: soil, leaf litter, crop residues, and weeds.
This approach stands apart from conventional organic methods through its radical emphasis on accessibility. While many organic systems depend on purchased compost, certified inputs, or specialized equipment, Jadam practitioners work with what’s immediately available. The philosophy centers on several core principles:
- Harnessing indigenous microorganisms from local soil and organic matter
- Creating water-based solutions that multiply beneficial microbes
- Sourcing all materials from your immediate environment
- Using minimal equipment, basic containers and simple tools suffice
- Scaling from small gardens to larger operations without proportional cost increases
The environmental benefits align closely with broader sustainable agriculture goals, including reduced synthetic inputs, enhanced soil biology, and closed-loop nutrient cycling. Jadam shares philosophical ground with permaculture farming in prioritizing natural processes and local resource utilization, though Jadam focuses specifically on ultra-low-cost microbial and nutrient solutions.
What makes this method particularly innovative is its deliberate removal of economic barriers. By teaching farmers to create their own biological inputs from free materials, Jadam opens sustainable farming practices to those who can’t afford commercial alternatives. You’re not buying bottled microbes or bagged amendments, you’re learning to cultivate them yourself, observing how your local ecosystem’s natural processes can drive soil fertility and plant health.
Essential Materials and Tools You’ll Need
Getting started with Jadam organic farming requires surprisingly little in terms of specialized equipment or materials. The method’s philosophy centers on accessibility, meaning you can begin with items commonly available in most agricultural or even household settings. Unlike conventional farming inputs that may require purchasing from specialized suppliers, Jadam preparations rely almost entirely on what you can source from your immediate environment.
The foundational materials you’ll need include:
- Large containers or drums (20-50 gallon capacity) for mixing and fermenting solutions
- Clean water source, preferably unchlorinated or dechlorinated water
- Leaf litter, plant materials, or healthy topsoil from undisturbed areas
- Sea salt or unrefined rock salt for microbial preservation
- Basic mixing tools such as wooden paddles or long sticks
- Breathable covers like cloth or burlap to protect fermenting solutions while allowing airflow
- Straining materials such as mesh bags or cheesecloth for filtering finished preparations
- Storage containers with lids for completed solutions
The quality of your source materials matters more than their cost. When selecting containers, look for food-grade plastic or non-reactive materials that won’t leach chemicals into your preparations. Your water source should be free from chlorine, which can inhibit microbial development, if using municipal water, let it sit uncovered for 24 hours to allow chlorine to dissipate.
For organic matter, prioritize materials from healthy, uncontaminated environments. Leaf litter from beneath deciduous trees, thriving garden soil, or fresh plant trimmings all work well. The key is accessing diverse microbial life that will populate your solutions.
Most farmers find they already own many of these items or can acquire them through local networks, farm supply stores, or repurposing existing containers. The emphasis on local sourcing isn’t just about cost, it ensures your microbial cultures are adapted to your specific growing environment.
Important Safety and Quality Considerations
Working with living microbial cultures requires attention to cleanliness and awareness of what healthy fermentation looks like. While Jadam preparations use beneficial microorganisms, contamination with harmful bacteria or mold can occur if basic hygiene isn’t followed.
Start with clean containers and tools. Rinse everything thoroughly with water before use, no need for sterilization, but visible dirt or residues invite problems. Your water source matters significantly. Use clean water free from chlorine (let tap water sit uncovered for 24 hours if chlorinated) and avoid water with obvious contamination, strong odors, or industrial runoff concerns.
During fermentation, you’ll notice bubbling, a slightly earthy or sweet smell, and gradual color changes, these are normal. However, a strong rotten odor, pink or black surface mold, or slimy texture signals something went wrong. Don’t use contaminated batches; compost them and start fresh with cleaner materials.
Store your finished preparations in cool, shaded areas away from direct sunlight. Extreme heat can kill beneficial microbes or encourage unwanted growth. Keep lids slightly loose during active fermentation to allow gases to escape, but secure them once the solution stabilizes to prevent debris or insects from entering.
When applying Jadam solutions, exercise common sense. Avoid spraying directly onto fruit or leaves you’ll harvest within a few days. For root crops and soil drenching, the risk is lower, but always wash produce thoroughly before eating. If you notice leaf burn or wilting after application, you’ve likely used too concentrated a solution, dilute more and test on a small area first.
Trust your observations. Healthy preparations should smell pleasant and earthy, not putrid. Your plants’ response will tell you if something’s working or needs adjustment.
Step-by-Step: Creating Your First Jadam Microbial Solution
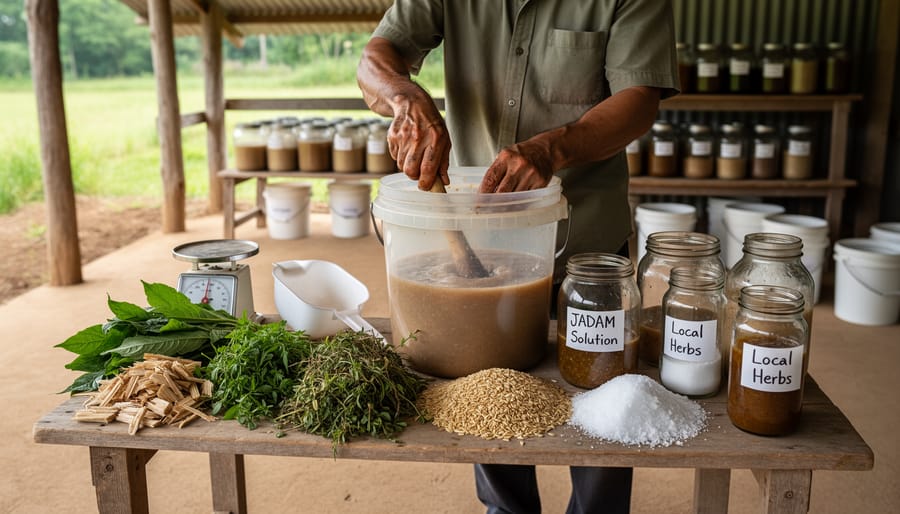
Preparing the Base Ingredients
Start with soil that’s alive. Look for earth that’s never seen chemicals, an undisturbed forest edge, the base of a healthy tree, or a thriving garden bed that’s been organic for years. Dig down a few inches where the soil looks dark and smells earthy, not stale. You want soil with visible organic matter breaking down, where fungi and microbes are actively working.
For leaf litter, gather what’s naturally decomposing under trees or shrubs. The sweet spot is material that’s soft enough to crumble but hasn’t fully turned to humus, think leaves that have been down for a season. Mix species if possible; diversity in your organic matter means diversity in your microbial culture.
Water quality matters more than most beginners realize. Use clean, non-chlorinated water, rainwater, well water, or tap water that’s sat uncovered for at least 24 hours so chlorine can evaporate. Municipal water with chloramine needs longer aeration or shouldn’t be used at all, as it kills the beneficial microbes you’re trying to cultivate. The water should be neither too cold nor too hot; room temperature or slightly warm works best for microbial activity.
The Fermentation Process
During fermentation, naturally occurring microorganisms multiply rapidly in your prepared mixture, breaking down organic matter and creating beneficial compounds. You’ll notice activity beginning as early as several hours after mixing, or it may take longer depending on conditions, there’s no single correct timeline.
Temperature plays the biggest role in how quickly fermentation progresses. Warmer conditions (comfortable room temperature or slightly above) speed up microbial activity, while cooler environments slow it down considerably. Direct sunlight can overheat your mixture and kill beneficial organisms, so find a spot with indirect light or shade.
The water quality and local microbial population in your soil also influence the process. Chlorinated tap water can inhibit fermentation, while clean rainwater or dechlorinated water supports it. The diversity of microbes in your starting soil determines how vigorously the culture develops.
You’ll observe visible changes as fermentation proceeds: bubbles forming on the surface, a slightly frothy appearance, and the liquid becoming cloudy. The smell shifts from earthy to a subtle, pleasant fermented scent, never harsh or putrid. If you see a thin white film developing on top, that’s normal microbial activity. These signs tell you the culture is alive and working, regardless of how many hours or days have passed.
Recognizing When Your Solution Is Ready
Your microbial solution signals readiness through several observable changes. A healthy JMS develops a slightly sweet, earthy smell, similar to rich forest soil after rain, rather than a sharp, rotten odor. The liquid typically becomes cloudy or milky in appearance as beneficial microorganisms multiply, and you may notice a thin white or cream-colored film forming on the surface.
Small bubbles often appear during active fermentation, indicating microbial activity. The solution should maintain a neutral to slightly acidic smell; any strong ammonia or putrid scent suggests contamination and the batch should be discarded. Temperature also plays a role, warmer conditions accelerate development, while cooler environments slow the process. Rather than counting days, observe these physical indicators: when the sweet earthy aroma stabilizes and bubbling subsides, your solution has likely matured. Some practitioners test a small amount on a few plants first, watching for positive response before broader application.
Making Jadam Liquid Fertilizer and Other Key Preparations
Beyond microbial solutions, Jadam farming relies on liquid fertilizers and other preparations made from plant materials and natural inputs you can gather locally. These preparations provide nutrients to your crops while building soil health, and they follow the same ultra-low-cost philosophy as JMS.
Jadam Liquid Fertilizer (JLF) forms the core of your nutrient strategy. You create it by fermenting plant materials in water, which breaks down the organic matter and releases nutrients in forms plants can absorb. The process mirrors JMS but focuses on specific materials chosen for their nutrient content rather than microbial diversity.
Start by selecting your plant materials based on what nutrients your crops need and what’s abundant in your area. Different materials contribute different nutrient profiles:
- Leafy greens and fresh grass clippings for nitrogen
- Fruit waste and vegetable scraps for potassium
- Indigenous plants adapted to your soil conditions
- Seaweed or kelp when coastal access permits
- Weeds pulled from healthy areas of your land
Fill a container about two-thirds full with chopped plant material, then add water to cover. Some practitioners add a handful of soil or leaf mold to introduce beneficial microbes. The fermentation happens in open containers, allowing gases to escape while the materials break down.
Watch for active bubbling and color changes as breakdown progresses. The liquid darkens and the plant matter softens. When fermentation slows, which you’ll notice by reduced bubbling and settling of materials, strain the liquid for use. The timing depends on temperature, materials, and microbial activity, so observation matters more than counting days.
Apply JLF by diluting it with water before use. Start with heavier dilutions and observe how your plants respond, then adjust based on growth patterns and leaf color. Soil drench applications feed roots directly, while lighter dilutions can work for foliar feeding when plants show specific deficiencies.
You can also create wetting agents from plant oils and potassium hydroxide, and calcium preparations from eggshells or oyster shells fermented in vinegar. Each preparation serves a specific purpose in your growing system, and you’ll develop your own recipes as you learn which local materials perform best in your conditions.
Testing and Applying Your Jadam Solutions
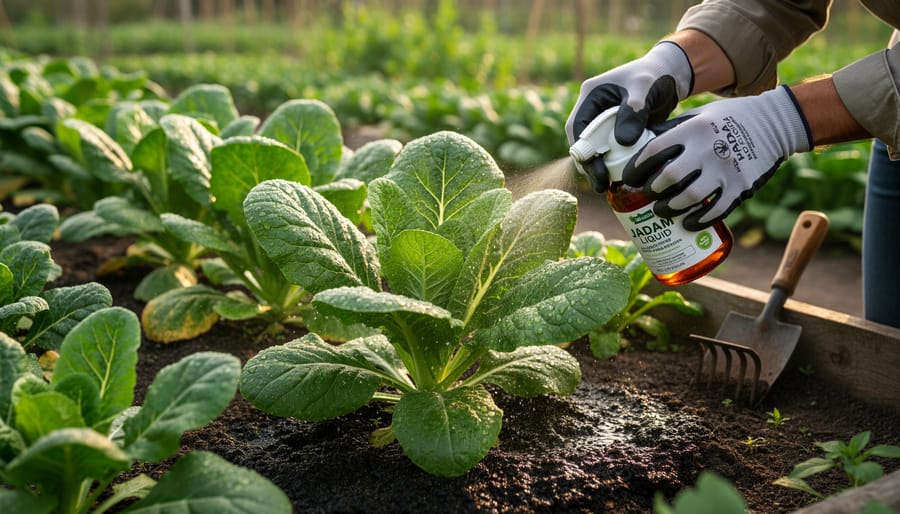
Testing your Jadam preparations before widespread use helps you understand how your specific solutions interact with your soil and crops. Start with a small test patch, a few plants or a corner of a bed, rather than treating your entire growing area at once. This approach lets you observe results and adjust your methods without risking your whole harvest.
For most Jadam microbial solutions, a common starting dilution is roughly one part solution to twenty parts water, though you’ll adjust based on what you observe. Your fermented preparations are concentrated living cultures, so diluting them appropriately prevents overwhelming plants or burning foliage. Mix your diluted solution in a watering can or sprayer, and apply it to your test area during cooler parts of the day to avoid leaf stress.
When applying to soil, water the diluted solution around the root zone as you would with regular irrigation. This method works well for establishing microbial activity in the soil and supporting root development. For foliar feeding, use a fine mist to cover leaf surfaces lightly, plants absorb nutrients and beneficial microbes through their leaves, making this especially useful during active growth periods. Whether you’re working with row crops or urban agriculture setups, the application principles remain consistent.
Follow these verification steps to assess your solutions:
- Apply to a small test area and mark it clearly for observation
- Check plant response over the following days, noting leaf color, vigor, and growth
- Adjust dilution ratios based on results, dilute more if you see stress, strengthen slightly if no response
- Monitor soil texture, moisture retention, and overall plant health indicators
- Scale up gradually to larger areas as you gain confidence in your specific ratios
How often you apply depends on your crops and what you observe. Some growers apply weekly during peak growth, others every two weeks for maintenance. Watch your plants, healthy, vigorous growth with good color suggests your current approach is working. Yellowing, wilting, or stunted growth means something needs adjustment, whether that’s dilution strength, application frequency, or the solution itself.
Next Steps: Scaling Your Jadam Practice
Once your initial Jadam preparations consistently support healthy plant growth, expand gradually to avoid overwhelming your capacity. Start with a single crop type or field section, observe performance over a complete growing cycle, then scale to additional areas. This measured approach lets you refine techniques without risking entire harvests if adjustments are needed.
Jadam methods integrate naturally with precision agriculture tools. Soil moisture sensors help determine when microbial applications will be most effective, while crop monitoring systems can track plant response to different solution concentrations. Environmental data loggers provide context for fermentation variables, helping you understand why certain batches perform differently.
Adapt your preparations to specific crop needs through observation and experimentation. Leafy vegetables may respond well to frequent dilute applications, while fruiting crops might benefit from targeted feeding during flowering. Monitor soil health indicators alongside plant performance to understand how Jadam inputs affect your growing environment over time.
Combining Jadam with composting, cover cropping, or integrated pest management creates synergistic benefits. The microbial solutions can accelerate compost maturation, while cover crop residues provide excellent material for liquid fertilizers. This integration strengthens overall farm resilience while maintaining the low-cost philosophy central to Jadam practice.
Frequently Asked Questions
How long before I see results with Jadam methods?
Plant response varies based on soil health, crop type, and growing conditions, but many practitioners observe improved vigor within weeks of consistent application. Start with small test areas and keep notes on what you observe rather than expecting a fixed timeline.
Does Jadam work in all climates and seasons?
The core principles apply universally, though fermentation speeds and microbial activity vary with temperature and humidity. Adapt your approach to local conditions, warmer environments typically see faster preparation development, while cooler climates may require longer observation periods or slight process adjustments.
How does Jadam compare to conventional certified organic farming?
Jadam focuses on ultra-low-cost inputs made from locally available materials, whereas conventional organic farming often relies on purchased certified products. Both share sustainability goals, and Jadam can complement certified organic practices while reducing input expenses.
How long can I store Jadam preparations?
Storage life depends on the specific preparation, storage conditions, and signs of active microbial life. Many solutions remain viable for weeks to months when kept in suitable containers away from extreme temperatures, though fresh batches often perform best, trust your senses and observe how plants respond.
The learning curve for Jadam farming is generally accessible to beginners, especially compared to complex agricultural technologies. Most practitioners find the basic preparations straightforward once they understand the core principles of microbial cultivation and observe their first successful batch. The method emphasizes experimentation and local adaptation rather than rigid protocols, which means you’ll develop practical knowledge through hands-on experience.
If a batch fails, showing off-putting odors, unusual colors, or poor plant response, you can simply compost it and start fresh. Common causes include contaminated water, poor-quality source materials, or unfavorable fermentation conditions. Each attempt teaches you what works in your specific environment, building the observational skills central to successful climate-challenged farming approaches.
Jadam integrates well with other sustainable practices including cover cropping, composting, and minimal tillage. Many farmers combine Jadam preparations with modern environmental monitoring tools to track soil health improvements and optimize application strategies. The method’s flexibility allows you to scale gradually, testing what works for your crops and conditions before committing to broader implementation.
Jadam organic farming offers a path to sustainable agriculture that’s remarkably accessible. By relying on locally sourced materials and simple microbial preparations, this approach removes many of the financial and technical barriers that often discourage farmers from adopting organic methods. You don’t need expensive inputs or specialized equipment, just observation, patience, and a willingness to work with natural processes.
Starting small is the key. Choose one crop or garden area, create your first microbial solution, and watch how your plants respond. Adapt the techniques to your soil, climate, and available materials. No two locations are identical, and the most successful Jadam practitioners are those who experiment and learn from direct experience rather than following rigid formulas.
This method aligns perfectly with the broader movement toward environmental stewardship and agricultural innovation. Whether you’re farming commercially or growing food at home, Jadam demonstrates that sustainability and cost-effectiveness can work together. The microbial solutions you create today contribute to healthier soil, reduced chemical dependency, and a more resilient food system.
Take the first step. Collect some soil, gather local organic matter, and begin. Your observations and adjustments will teach you more than any manual ever could.